Monday, March 23, 2015

Another workshop!


Due to the huge success of the workshop last fall, we will be hosting another one June 1st through the 12th! We will be building a Cypress 20' model house, as pictured above, designed by the Tumbleweed Tiny House Co. This time we will be expanding it into a two week program. During the first week we will build the frame of the house on a brand new Tumbleweed trailer. We will finish the framing, sheathing, roofing, windows and doors. By the end of the week it will be a weatherproof shell. Week two will focus on everything else needed to finish the house including things such as insulation, wiring, plumbing, propane, and finish carpentry on the inside and out. Participants are welcome to attend either week, or both for the full experience.

Please see the Worcester Think Tank website for more information and to register, but remember that tiny houses are huge right now(sorry...), and spaces will go fast!

Wednesday, November 26, 2014

Tiny House Workshop Recap


Thank you to everyone who made the first tiny house building workshop so successful! It was our first workshop in collaboration with 
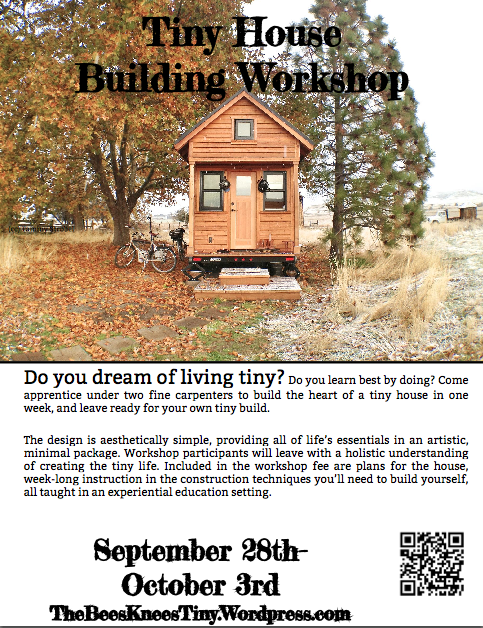
Worcester Think Tank, and we had a full house with six participants! The goal of the workshop was to start with a bare trailer, and we had hoped that by the end of the week we would have a house fully framed, sheathed, roofed, wrapped, the windows installed and a little bit of the sidewall shingling complete.


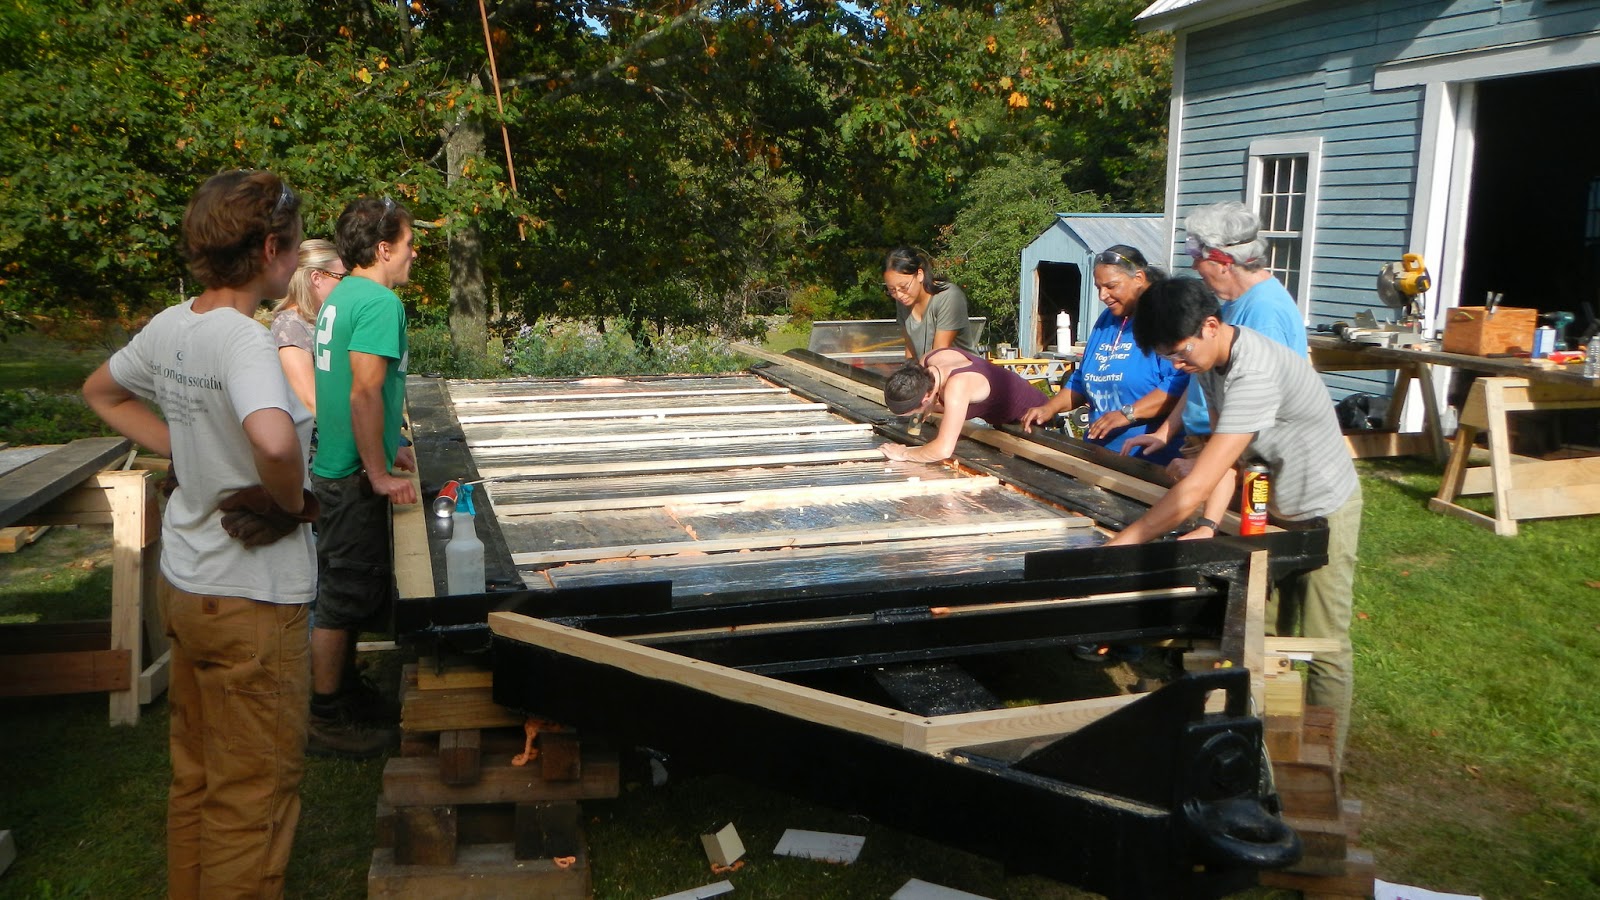
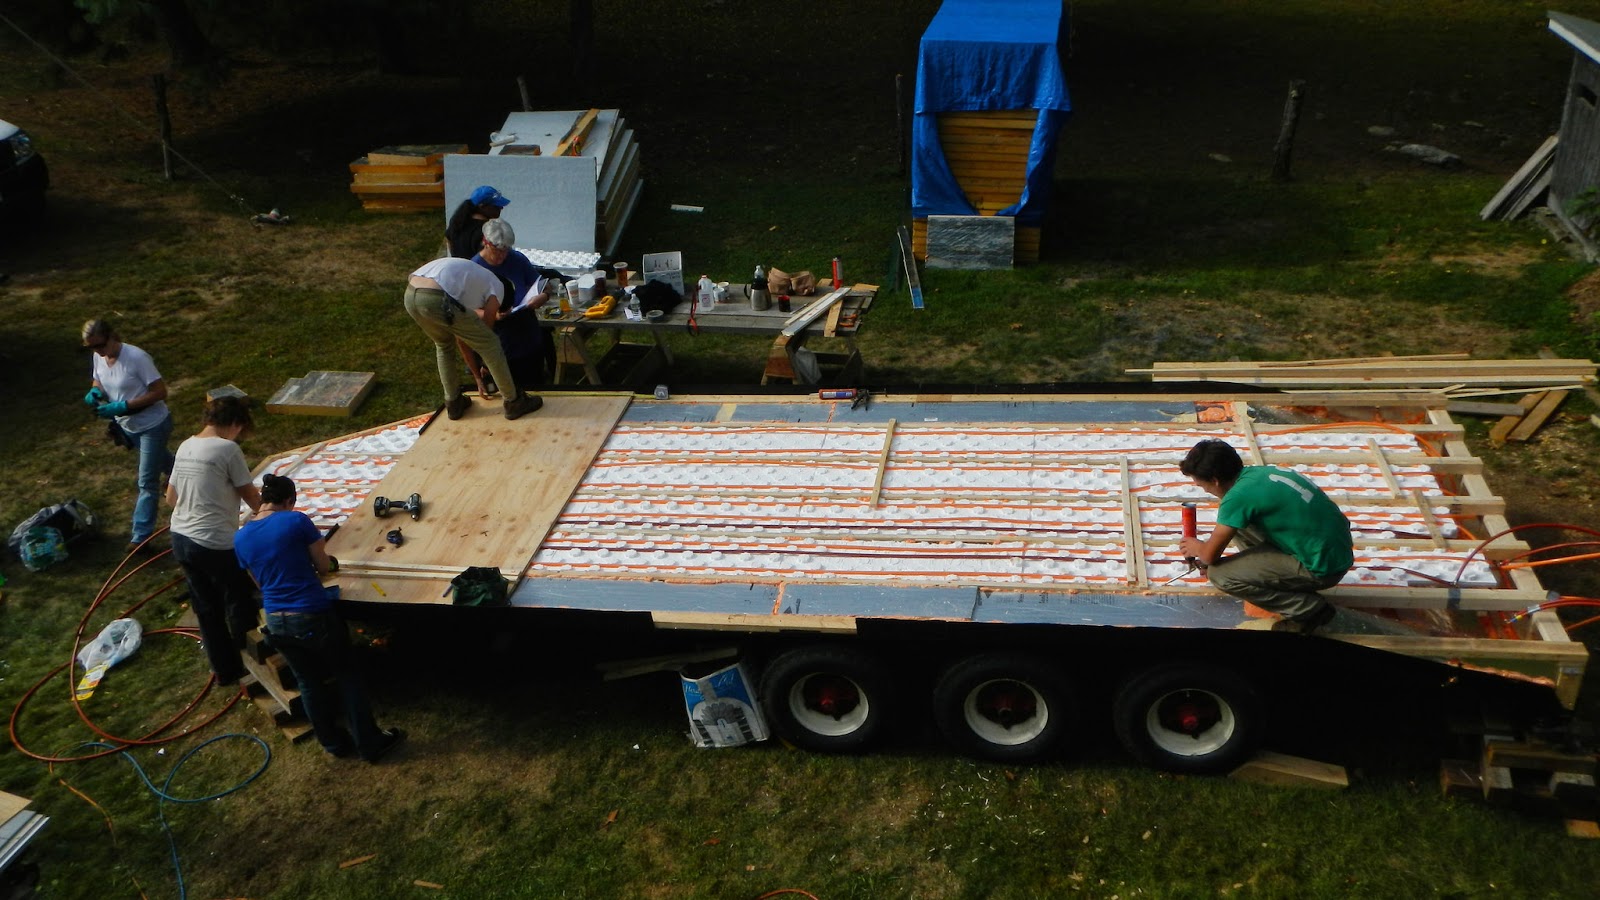
The week started out with a nice hot sunny day. The participants arrived for a delicious lunch prepared by Giseli, our chef for the week. We can't thank her enough for her work. Coming in from and intense morning of learning and physical labor to a hot, healthy, and delicious meal was very important. She managed to read the weather and mood of the group and come up with a perfect meal each day, most of it grown in the gardens on the property. After getting settled and introductions, we went right to work, starting with tool safety, then jumping right into preparing the deck. One of the most challenging aspects of building a tiny house is preparing the trailer and creating a level, square platform to build off of. This is especially tricky if you are using a used trailer as it most likely has been overloaded and abused during its life. Every steel member of the trailer was padded out with specially cut wood shims and joists. We placed polyiso rigid foam in between the steel framing. This is when the first change-order happened. We thought, why not install radiant heat tubing while the floor was still opened up? The materials are inexpensive, and it gives Hannah the option of distributing the heat from the woodstove, or heating with a small propane or solar hydronic system. It would be very hard to retrofit later. Something we learned early on is that Hannah like being warm. Hannah found a foam insulation product with molded in tracks for the tubing. This would be installed directly under the subfloor. We worked late into the night to try to stay on schedule with the added work.


Day two involved finishing the radiant heating, some plumbing for the bathroom up front, building a section over the trailer's beavertail, and installing the subfloor. Everyone worked very well together to get this major section of work finished.


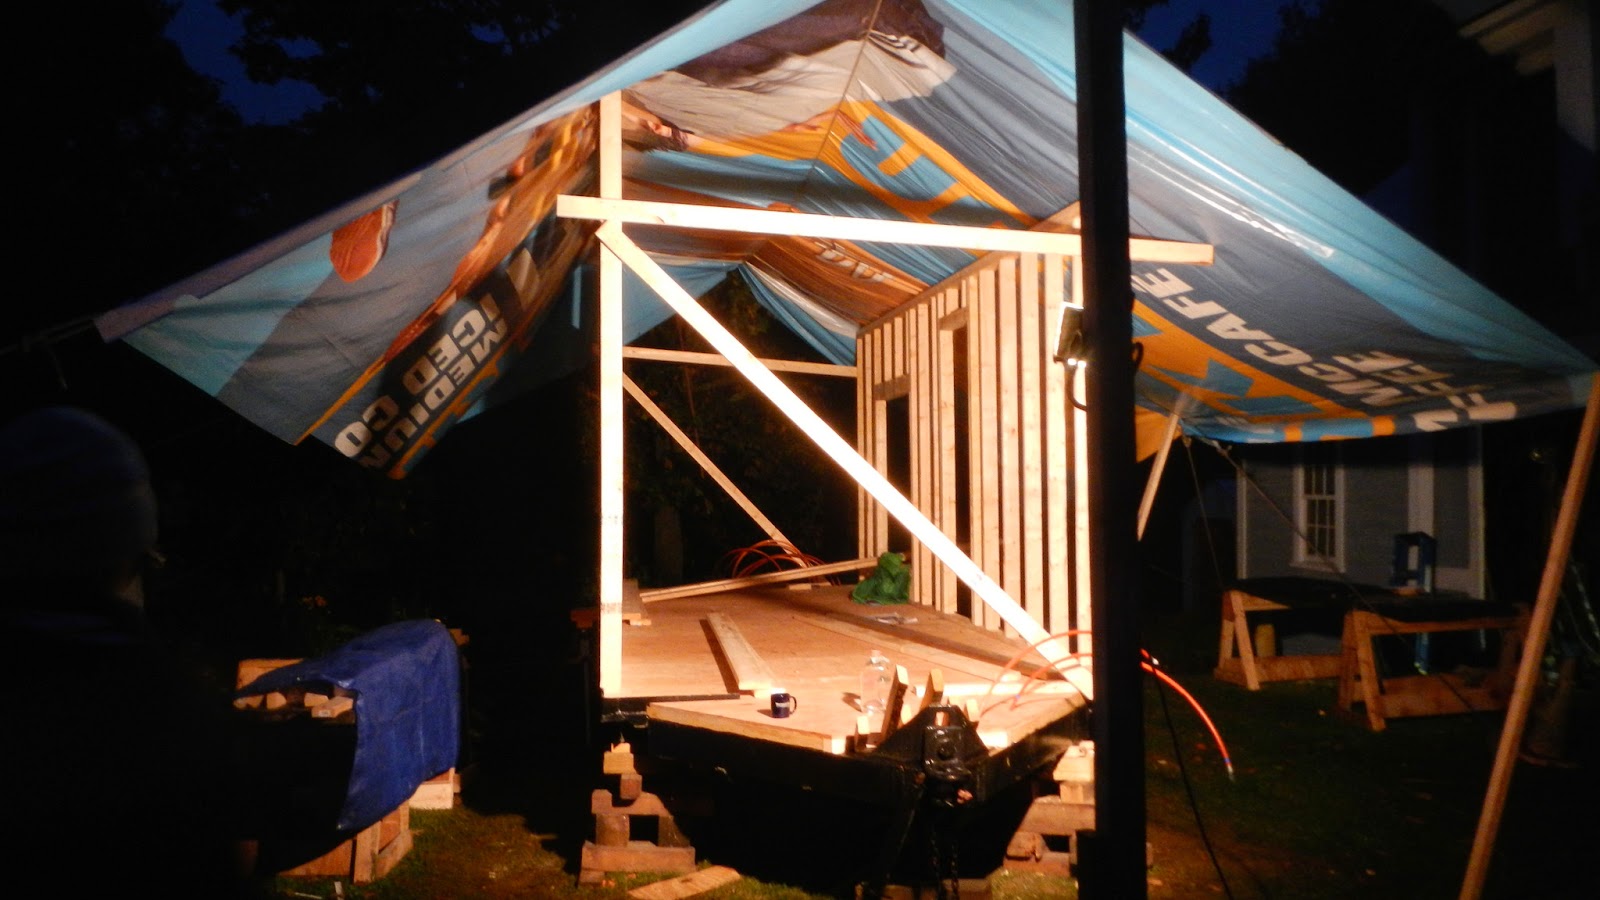
The third day started out cold, and then turned downright raw when the rain started. This would become a standard condition for much of the rest of the workshop. Luckily we had anticipated this and the team spent some time setting up the bigtop tent which was constructed out of and old billboard, some rope and stakes. It worked quite well to keep us and the tools dry. We learned about material options and selection as we build the first wall. Everyone seemed to understand the need for accurate measurements and cuts, and soon were measuring finer than a sixteenth of an inch. The resulting walls were better looking than those made by many professional framing crews... At the end of another late night we had both long walls standing.


On the fourth day we worked on the two end walls, pausing briefly for a geometry and trigonometry lesson. Yes, those subjects you glossed over in school actually do become useful. It seemed to be a particularly cold wet day. Needless to say, everyone was ready for a hot lunch in front of the fireplace after that.


Day five was spent squaring up the frame, applying the sheathing and working on the roof system. The rain broke and we were able to disassemble the tent, just in time for the roof work! While working on the rafters, I even saw some trig functions scrawled on the studs and calculators being used. Success!


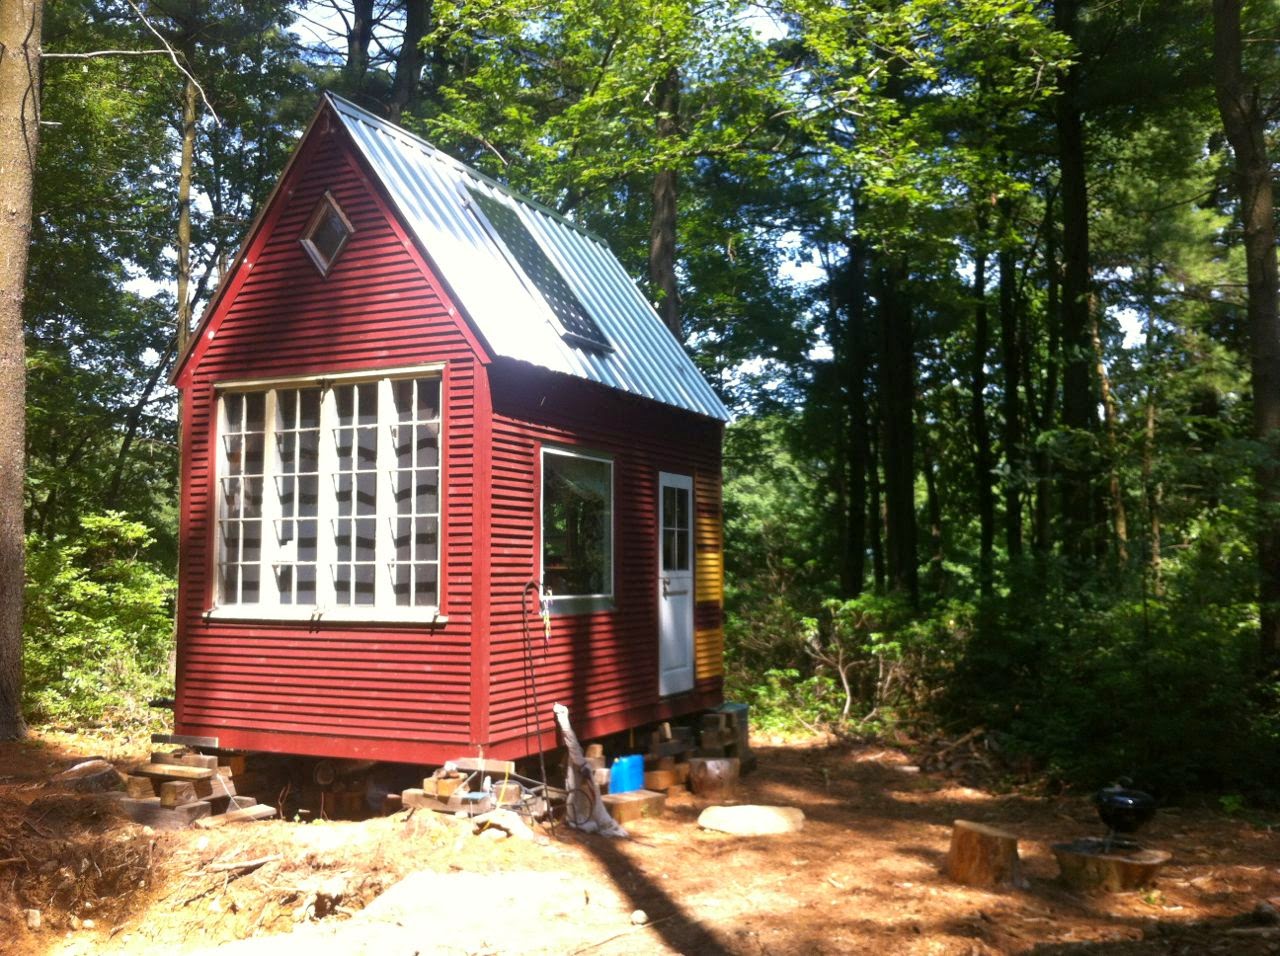
On the last day we installed the steel roofing, wrapped the house with tar paper and installed one of the windows. We broke early for a little celebration and discussion of the week.


While we didn't get quite as far as hoped, we actually covered more material that we planned to and the only thing that was omitted was shingling. I know that on the organizational end, Dermott, Hannah, Lauren and I were incredibly happy with the entire experience. I saw a lot of smiles on the faces of the participants as well. By the end people were working together and tackling tasks like they had been doing it for a long time. I am confident that if we had that crew for another week we could have been well on the way to having a finished house!


Thank you again, and come on back for the next workshop!

*all photos taken by D. Morley


Monday, October 6, 2014

Photos from the workshop

Check out this set of photos from the workshop. There will be a recap posted soon, but for now enjoy the pictures!

Photo by D. Morley


Hannah's Tiny House

Monday, September 1, 2014

Tiny house building workshop announced!


Hey Everyone,

I am excited to announce that I will be helping to teach a one week workshop offered through Worcester Think Tank on building a tiny house! We will start with a 20' trailer, and in one week build the frame, sheath it, add windows, a roof, and siding. You will learn everything you need to know to build your own tiny house to the point that it is weather tight. This will be taking place on a farm in Leicester MA, just outside of Worcester. Send me an email if you have any questions, but spaces are filling fast!

Here is the website for the course.
Registration can be done here.

Electricity

Once I installed the steel roof, I was finally able to put the solar panel back up on the roof. See this post for more info on the system. Not much has changed with the system other than a little house to keep the batteries in.


Eventually these will live in the basement.

I am still not catching as much energy as I should be because of the shade from the trees, but as long as I am careful about turning things off when they are not being used, I am getting enough energy to power three lights, the water pump, an amplifier for music, and an inverter to charge computers, phones and power a wireless router. It is amazing how little electricity we need if we are careful.


This is a short time lapse video showing the shade patterns on the roof throughout the day. It is far from ideal for a solar panel, but it works for now.

Roof

For the past four years, I have had some version of a tarp on the roof. I went through a couple of regular tarps, and two retired billboards. I have been trying to hold out for the final standing seam copper roof, but is is going to be expensive and complicated to construct. When it came time for a new tarp this summer, I finally broke down and bought the most inexpensive galvanized steel roofing I could get. For about $250 and 5 hours of work, I have a leak proof roof that I don't need to worry about. Eventually when I build the skylights and copper roof, the steel can just be unscrewed and used on another project. I wish I did this four years ago...


Water

For the past few months we have had running hot water! The system is still in testing mode and I will have to reconfigure it for winter, but it has been nice to turn on the tap and have instant hot or cold water.


Right now the system consists of two 55 gallon drums that I fill with a hose, then drive up to the house. These two drums last about a month before needing to be refilled. Once at the house, I hook them up the the panel you see in the photo. There is a 12V SureFlo pump that turns on when the tap opens. From there the water either goes straight to the cold tap, or through an on-demand propane water heater. The water heater is an Ecotemp L5. After a few months of using it, I can barely feel a difference in the weight of the propane tank. Right now the sink drain just goes through the floor and drains onto the ground.

Before winter I hope to have a basement finished for the house (more on that later). When that happens, I am going to try to sink a drive-point well in the basement. See this site for information on what that is. This will also give me a spot to run all of my plumbing that will be easier to protect from freezing. I will also have to dig a small drainage field for the grey water.

Saturday, January 4, 2014

Installing a countertop in under 30 seconds


Once again, inclement weather seemed to motivate me to make a major change to the house. Lauren and I have been staying out there more in the cold weather. It is actually warmer in the house with the wood stove going than it is in our apartment. Last week I hooked up the little propane cook stove, but without a surface to prepare food on it was surprisingly hard to cook a meal. After staying in the house for the first day of the storm, we realized that it was time for a countertop.

By the time I was able to get back to the shop with the measurements and a small sink that I found at the ReStore, it was already six o'clock, and the snow drifts were building. I used a piece of knotty-pine plywood that I had at the shop for the countertop, cutting a hole for the sink and coping around the posts. I chopped up some 2x4's for the frame, loaded the tools and headed back out to the house. By this time it was nearly ten o'clock and the temperature had plummeted to one degree, with 20 mph winds. Near blizzard conditions. It took three trips through the woods to bring the supplies up. The last one must have been a sight if anyone had been watching. The eight foot countertop acting as a sail under my arm was knocking me around, but the cast iron sink I was wearing as a hat kept me safe. Once I was back in the warmth and comfort of the house the installation went very well. Enjoy the video!

In the next few days I will get the drain hooked up to a catch bucket under the house so we can at least do some light dish washing. After all, this is still just a temporary solution until I build a real cabinet and concrete countertops.

Sunday, December 15, 2013

Thursday, December 5, 2013

In the Pines


A foggy night with Jupiter

Tuesday, November 19, 2013

Getting settled.

The move is complete! The house is now sitting on temporary wooden cribbing awaiting a proper foundation. The roof panels are back on, once again with a tarp keeping everything dry. Lauren and I spent our first night out there last night under a full moon. It was a cold windy night, but the stove kept the cold out while we listened to the wind sweeping through the pines. We had a very restful sleep, then woke up to a fiery sunrise before heading back to a hungry cat and our busy days. This is definitely the most peaceful place it has ever been.

Unfortunately I did not have time to photograph much of the second part of the move, but luckily others did! Follow this link for a great series.

dukemantree Flickr series

Sunday, November 3, 2013

The Move - Part III

Here is the first of a series showing how the house gets packed up and moved. Every time this happens the system gets refined, but there is no way around it: It is a lot of work! For now, enjoy this time lapse series.

This first series photographed by Russell U.


The Move- Part II

Two years has passed since the house was relocated to my shop in Worcester. It is time to move again. Lauren and I are taking it just a few miles out of the city to a beautiful piece of land in a neighboring town. Once again we will be surrounded by the sounds of nature. Even on our first night in a tent we had a visit by a curious Barred Owl. Otherwise, I have seen signs of fox, moose, coyotes, deer and many other woodland animals. Even the sounds of the train I know so well from the shop occasionally filters up into the hills. The site is situated in a small pine forest, surrounded by many acres of well maintained hardwood forests, sunny meadows, and low wetlands. But from our perch we have well drained soil, steady air movement and soft filtered sunlight. Ideal!


The first step was to make a small clearing for the house. A couple of weeks ago Dermott and I enlarged a clearing that was created by the ice storm of 2008. We dropped many of the standing dead pine trees. The logs will be milled into lumber for future building projects. They were still deep in the woods though. With the generous help of Dale (the person), and Jake and Judy (the horses), from Mesa Farm in Rutland, we pulled about thirty logs to a staging area in one of the meadows where we will have them milled.


It is amazing to watch the power of these gentle horses. They seem to do their work so happily and effortlessly. The jingle of tackle and chains, their snorts, clomps, and even somewhat musical flatulence are so much more pleasant than the din of a skidder. In the end, they leave only a clean swept path through the woods.


Lauren and Dermott admire the work. Almost ready for a little house!


Thank you so much Dale, Jake and Judy!

Sunday, October 20, 2013